How to build a game world
Start with a place.
Give it a life.
A wayhouse at the edge of the pines. A keeper with something to hide. A road players learn to recognise. Build your first area in an existing multiplayer world, with Icesus Creator.
Sign in with your game character. Building access follows approval of your area plan. New here? See how to begin.
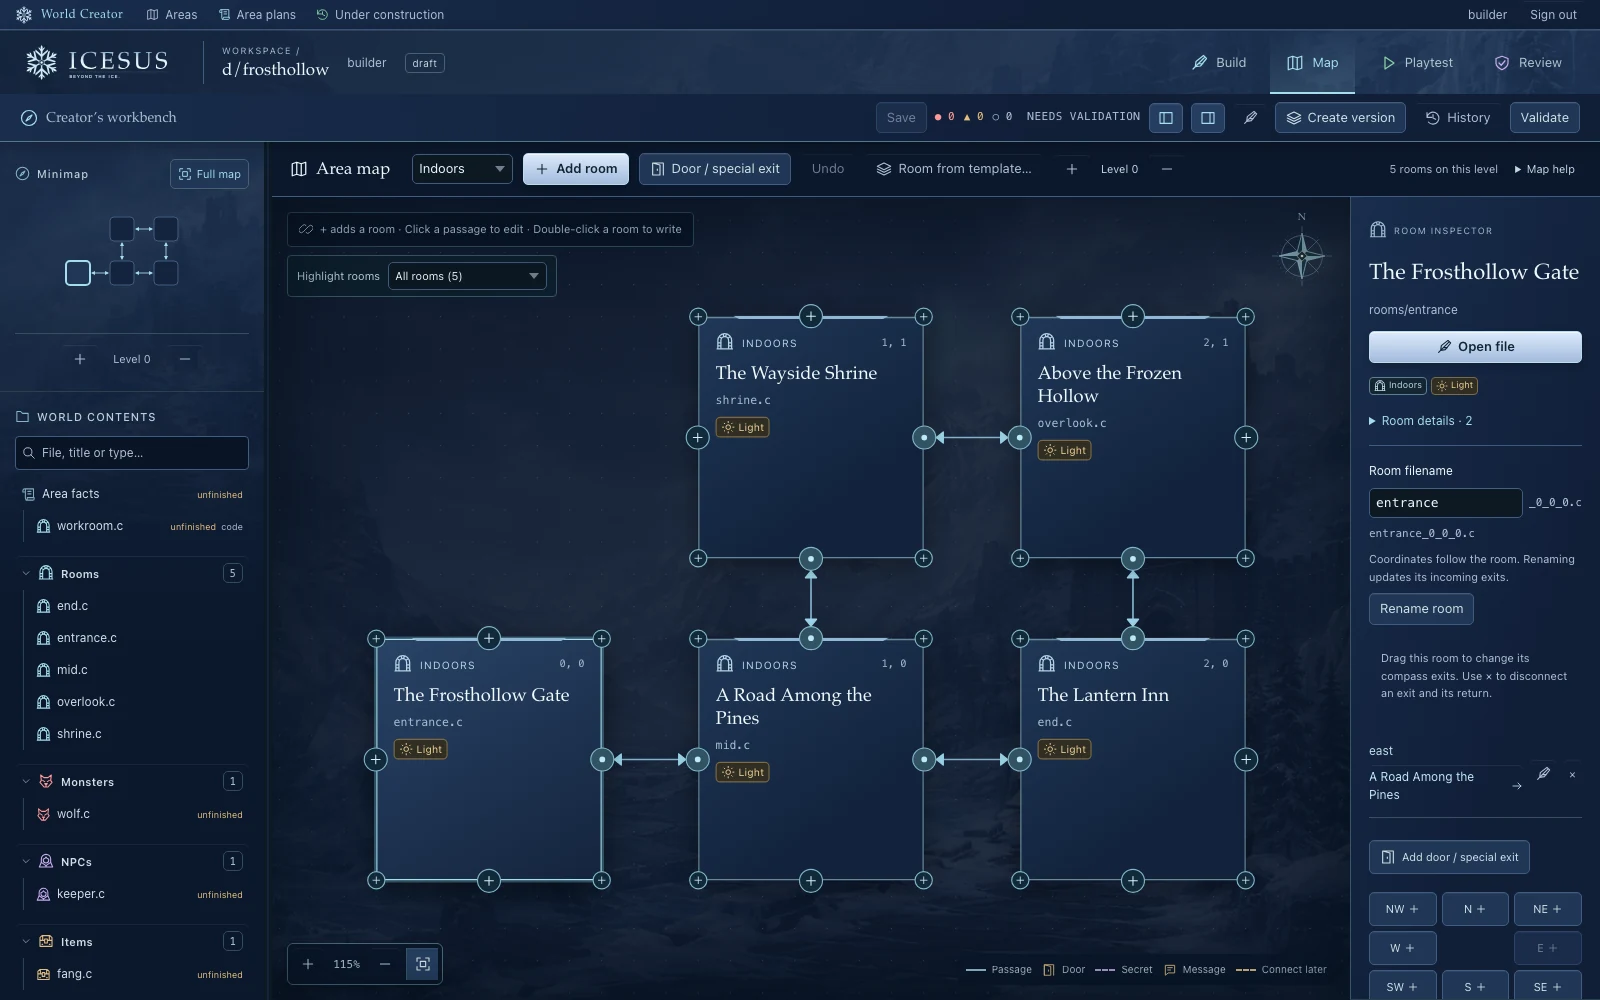

Rooms, people and discoveriesBuild a place players can explore

An existing game underneathUse its combat and character systems

Feedback before releasePlan, playtest and review

Your writing becomes somewhere a player can go.
A text world is made of places, connections and things people can act on.
Each room tells the player where they are and offers exits, details and encounters. Your job is to make those pieces add up to an experience: a safe arrival, a clue, a choice, a risk and a way home.
Icesus already provides movement, characters, combat and equipment systems. You build content within those rules. For the wider question of running your own server, see how to make a MUD.

Plan the experience before expanding the map.
Describe the area’s purpose, intended players and place in the world. Then make a small route that proves the idea.
Give it a reason to be here.
Choose a location and a connection to existing roads, settlements or lore. Explain who uses the place and what has changed.
Explore the world map →Make the route readable.
Plan an entrance, a recognisable landmark and a return path. Let descriptions prepare players for danger before they step into it.
Shape a room →Leave room for feedback.
Share a bounded area plan with the community. Agree on scope and fit before investing in a large network of rooms.
See the review workflow →
Write the details a curious player will try.
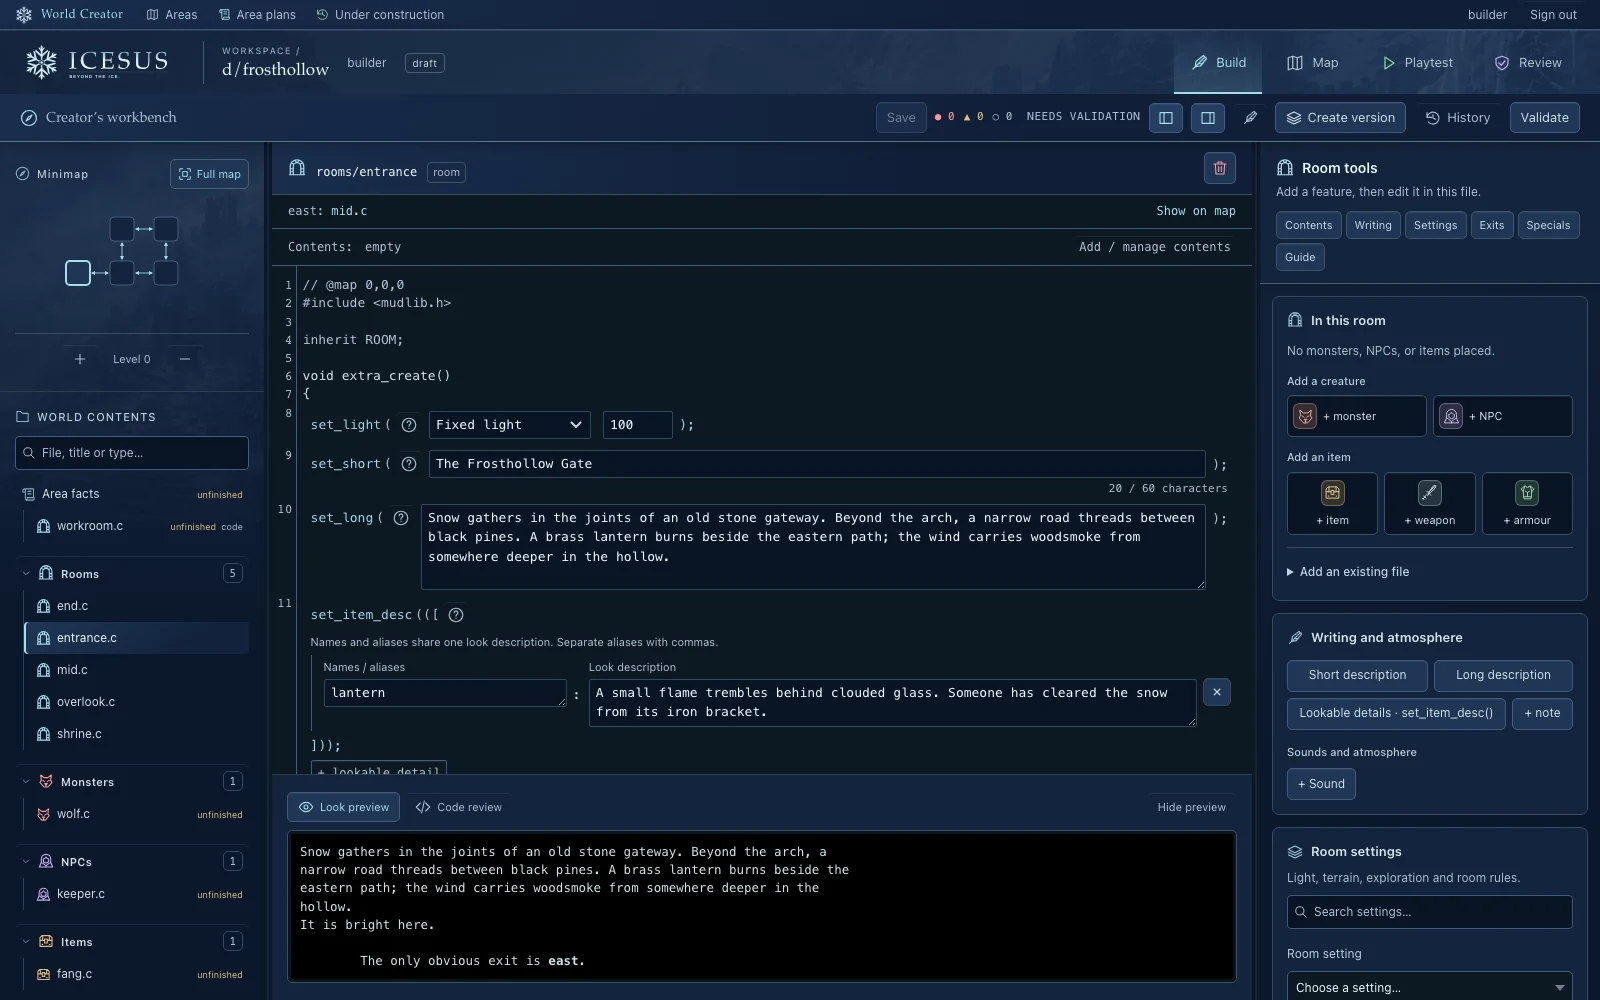
A room description should help someone picture the place and decide what to do. Mention a broken sign, a barred door or a cold hearth, then give those details a response when examined.
In Creator, descriptions and settings sit alongside the source they control. You can inspect how a room works and keep refining its writing as you test it.
Illustrative room description
At the unlit wayhouse
Snow has gathered in the iron basket above the gate. A narrow trail reaches the door; beside it, an empty hook swings against the wall.
Design questions: What was on the hook? Can the gate open? Does examining the basket reveal why it is dark?

Give the inhabitants something to do.
A keeper waiting for a delivery is easier to write than a character whose only purpose is to recite the backstory.
A role in the place
Decide why each inhabitant is here, what they want and how they respond to a visitor. Keep dialogue useful and specific.
Connect a person to a quest →A readable encounter
Introduce danger through the room and creature descriptions. Test the fight with the kind of character the area is intended for.
Plan the playtest →A detail worth noticing
Let curiosity find a clue, a reaction or a small piece of history. Make the nouns in your descriptions worth examining.
Return to the room example →
Make objects belong to the place.
Equipment, supplies and keepsakes tell a story too. A repaired lantern, a ledger or a worn shield can suggest who lives here and what they value.
Start from an appropriate existing example. Give each object a clear description and purpose, then review its usefulness and rewards alongside the rest of the area. Avoid making an item valuable only because its numbers are larger.

Build a chain of choices and consequences.
For the wayhouse example, the player might learn why the beacon went dark, follow evidence along the road and choose how to help. Work out what happens if they leave halfway through, return later or arrive after another player.
Keep the scope small enough to test every step. A convincing person and a clear consequence can carry a short quest. Read the surrounding lore so the addition belongs to Icesus.

Build alongside a world with history.
Icesus has grown through volunteer contributions since 1995. Its places give you examples to study; its community gives you people to discuss ideas with.
An approved area can become part of someone else’s adventure. Getting there means learning the setting, using the existing game systems and responding to review.
Play it, revise it, then ask for review.
Walk every exit. Examine the details you mentioned. Try conversations, encounters and rewards, including what happens when a player stops or takes an unexpected route.
Save your work, run the available checks and use Playtest to experience the area. Record the results for reviewers. Content needs review and approval before it joins the live world.
Your route into creating.
-
Get to know the game.
Start playing and reach player level 25. Bring clear English writing and an interest in how the world works.
-
Talk through an idea.
Join Discord and find #creator. Discuss a small area, then submit an area plan in Creator for review.
-
Build after plan approval.
Use your workspace to write and playtest. Submit the finished area for wizard review and work through the feedback.
You can join the conversation now.
You do not need a finished proposal to introduce yourself in #creator.
A few useful answers
Do I need to be a wizard to contribute an area?
Creator lets players contribute areas with wizard review. Becoming a wizard is a separate path. Start by learning Icesus, reaching player level 25 and discussing an area plan with the community.
Do I need to know how to code?
You can begin with writing, design and Creator’s visual controls. Content uses LPC source, and custom behaviour may need code. Learn from existing examples and ask for help as the design grows.
Does saving my area put it in the live game?
No. Plan approval opens the building path; finished content needs playtesting and wizard review before release. A saved draft is not a published area.
What should my first project be?
Choose a small place with a clear purpose: a road, wayhouse, shrine or short dungeon. Explain who visits, what they can discover and where it fits before expanding the map.
Keep exploring
Your next step
A place someone might remember.
Start with one idea you want another player to discover. Learn the world, share a plan and develop it with the people who build here.
Sign in with your game character. Building access follows approval of your area plan. New here? See how to begin.